Vegan White Forest Cake.... what a dream. I have always loved black forest desserts- the combination of cherries and chocolate is beautiful. This cake takes the cherry chocolate combination to a whole new level. This white forest cake holds the same traditions as its black forest counterpart. However in this cake white chocolate is used instead of darker chocolate. This creates a slightly sweeter cake which is perfect for the summer time!

The sponge is a soft, moist sponge and the buttercream is flavoured with white chocolate. Layered with cherry jam and fresh cherries, this cake is a perfect fruity chocolate option. To make this in a black forest version, it is easy to adapt this recipe. Simply substitute the white chocolate for dark chocolate and add cocoa to your cake batter. I can do a whole different recipe for this at some point if you would like (let me know!)
Equipment
This cake is four layered and around 5.5 inches. I use silicone cake tins to make my sponge as I feel that they bake evenly and are easier to get the cakes out. If you wanted a larger cake, you can increase the ingredient portions of this recipe. To evenly level your cake sponges out, buy a cake leveller.
Ingredients
I used a combination of fresh cherries and cherry jam within this cake. I placed cherry jam in between the sponge layers and decorated the cake with fresh cherries. You can choose to just use fresh cherries if you wanted! You could cut the cherries up into small chunks and use that as the layers between the sponge. The buttercream is a white chocolate ganache buttercream. It has 3 ingredients: butter, icing sugar and white chocolate. It creates a wonderful flavour whilst the texture is smooth and creamy.
I hope you enjoy this vegan white forest cake recipe. Let me know how you get on with it in the comments below.
G x
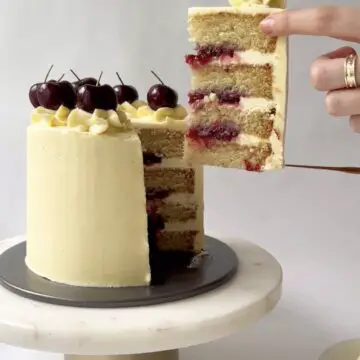
Vegan White Forest Cake
Ingredients
- 400 ml Almond milk unsweetened
- 1 tablespoon Apple cider vinegar
- 300 g Sugar caster, super-fine
- 1 ½ teaspoon Vanilla extract
- 150 ml Vegetable oil
- 350 g Flour plain, white, all-purpose
- ¾ teaspoon Baking powder
- 1 teaspoon Baking soda (bicarbonate of soda)
- ½ teaspoon Salt
For the Icing
- 300 g Butter
- 250 g White chocolate
- 450 g Icing sugar
For the filling/ decoration
- 2 handfuls Fresh cherries
- 3 tablespoon Cherry jam for each layer
Instructions
- Pre-heat your oven to 180°C/ 357F.
- In a large bowl, combine the milk and the apple cider vinegar. Put this to the side and allow it to curdle for a couple of minutes. Then add the oil and sugar. In another bowl, sieve the flour, salt, baking powder, soda + salt and combine. Using a large spoon, add the dry mixture to the wet, whisking as you go.
- Line two deep 5.5-inch baking trays with baking paper. I use silicone ones- you can buy the exact ones I use following the link in the written text above the ingredients! Pour your cake batter into both tins, evenly. Bake for 45 minutes, or until a knife comes out clean.
- Once your cake is completely cool, slice the cake into four even layers. I use a cake leveller to do this as it is WAY easier than using a knife. To use this, set your leveller to the height you want your cake to be, and then use it to cut your sponges.
- Melt your chocolate and then leave to cool. In a standing mixer, mix the butter until it has softened slightly (if you are working with already soft butter, skip this step). Add the icing sugar and mix on a low speed for around 30 seconds and then increase to a high speed, until combined and fluffy (around 1-2 minutes). Once your chocolate has come back down to room temperature, pour it into your mixer and beat on a low speed, until all combined. I then placed my icing in the fridge for around an hour to allow it to firm up. When i removed it, i softened it slightly by mixing it with a spoon. If you think your icing is too soft you can always add more icing sugar.
- Using a cake plate, layer all of the sponges up evenly with icing. Within each icing layer, create an icing barrier around the edge and place approx 1 tablespoon of cherry jam in the middle. Piping bags make this easier.
- Using the piping bag with icing in, spread the icing around the edge and the top of the cake. Use a cake spatula to smooth all out. If you don’t have these, you can do more of a rustic pattern with a knife. Place the cake in the fridge to cool for as long as possible (ideally at least a couple of hours).
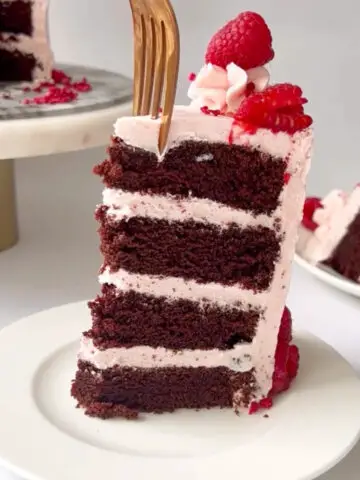
- Decorate the top of the cake in whatever way you want. I did icing swirls and then placed cherries on top. ENJOY!


Leave a Reply